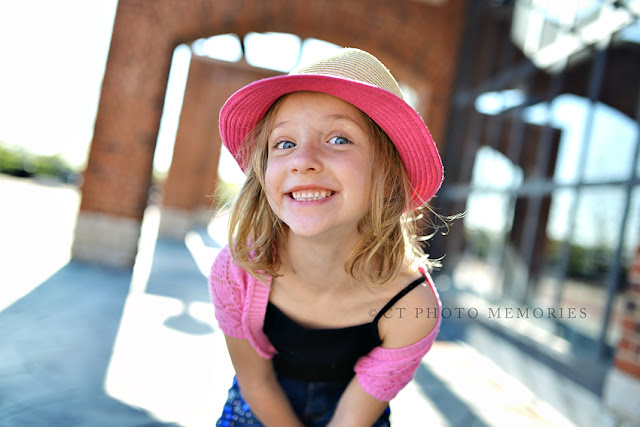
I've had a few FULL family sessions here lately...

When I used to shoot weddings, I had lots of large group images to shoot as well...

Photography can already be daunting when you are really wanting beautiful story-telling images...but, throw roughly 15 different individuals into the mix and things get a little crazy...

and not just with the photography part...

there's posing and keeping kiddos happy and lots of checks and rechecks...

Here are a list of things that I tend to run through the checklist in my mind as I'm photographing large groups...

1. Try to keep everyone on the same plane:  This means, you almost want to pretend that everyone is a mime and they are trying to get out of the "box" so to speak (are you picturing everyone with white gloves and painted faces putting their hands on the imaginary glass?) The more you are able to keep everyone's faces somewhat on that "plane" the better chance you have at being able to still get some beautiful bokeh AND getting sharp images.

(f 1.6   1/3200  ISO 500)

2. Keep in mind your depth of field as it pertains to your aperture.  There are two schools of thought here...1) you CAN have a low aperture...even as wide as 1.6 with lots of people (see my example above) However, IF that is the case, it is IMPERATIVE that you not only keep them on the same plane but, you also have to keep in mind just how far away you (and your camera) are from the subjects.  The further away you are, the wider IN focus area you will have.
2) bump your aperture up to at least f4.  If you remember in our Snapshop class we talked about aperture and I gave you the example of the telescope?  The higher the number, the more in focus...but, you will also lose bokeh if you go too high.

(f 2.5   1/640   ISO 400)

3. Have everyone touching in some way. This goes more in line with my philosophy of photography than anything else, but the last thing you want with large group photos is for it look like a mugshot line up.  Typically, with large groups, in my line of "work" they are FAMILY...so remind them to get close...even into each other's personal space...it's only for a little bit of time, but very worth it in the end.
(f 3.5   1/640  ISO 400)

4. Line up feet.  This pertains more to groups that are only in one line, but people tend to want to form a "U" shape instead of staying on that "same plane" as I mentioned before.  Sometimes I just have them scooooot back on the ends to form a straighter line.

5. Keep your shutterspeed FAST!  This is critical!  Especially if your aperture is lower...It also sometimes means that you have to bump up your ISO to compensate and allow for that increased speed.  You still need a good amount of light!

6. Check your LCD screen.  Yes, this takes time and you have to make people wait a second before moving...but, the alternative is to realize AFTER everyone has moved out of position that you have blinks or someone's head is hidden or there is a blur somewhere...I typically will sing them a song or tell a joke or do something to keep their attention IN THEIR SPOT while I do a quick check!  

Friends, I hope this helps you when you are planning your get togethers this fall and winter!  I know large family pictures can be challenging, but if you keep these tips in mind, I know that they'll help you in getting those images that you envision!!!

(if you are still having trouble, I would definitely look into getting your lens and/or camera cleaned & calibrated just in case there is a mechnical issue...especially if you've tried all these suggestions listed above)

HAPPY FALL Y'ALL!!!
"Moooooooooommmmmmmmmmm, it's too BRIGHT!!!"

My daughters all have sensitive eyes...

I mean, their eyes literally start to water the minute they hit the outdoors on a sunshiney day...We've invested in sunglasses and hats to help...but, I'm sad to say, they are just going to end up with eye wrinkles when they get older because in full sun, their eyes resemble slits on their faces instead of actual eyeballs...

Some of you know what I'm talking about...you've tried to get pictures at the park, or at the fair, or even on the beach in the summer and everyone is squinting or there are hot spots or racoon eyes...

What can you do?  Do you just skip out on midday picture taking fun?  Do you just resolve in your mind that you aren't going to get any "good" pictures of your kids during the hours of 10am to 5pm any particular day unless you are indoors?

Ummmm...Heck to the NO!!!

Here are some tips that I believe will help you as you determine to capture the lives of your kids, in any situation...whether it be swimming in the sunshine, playing at the park, playing an outdoor sport...

It takes a little preparation on your part and of course some practice, but these "micro" adjustments can have "macro" results on your final images!

Here we go:

1. SPOT METER:  This means to set your metering to SPOT.  Canon & Nikon have different metering options...you can read THIS post for more information about that. Spot metering forces your camera to just measure the light that you need to expose for your subjects FACE only...it won't take into account, the bright sun/blinding light...it only reads on your subjects face.  This may cause you to adjust your settings such that it blows out that background, but at least you won't end up with silhouette pictures and you'll be able to SEE the smiles from the moment!

2. RE-POSITION: Sometimes this refers to YOU and sometimes it refers to the SUBJECT.  If you are taking pictures specifically, you can reposition your subjects...for example, if there isn't necessarily a "moment" happening, but rather you are documenting the "characters" of your story, you can move them (continue reading the other tips) OR you can move yourself...You may have to shoot right into the sun, and maybe even use your lens hood or hand to block the sun into your lens (sort of like the visor in your car).  You want to have your subject turn AWAY from the sun.  This helps to avoid the half & half shadows on faces or even the racoon eyes that the harsh light can cause.


3. TRY TO FIND SHADE/FILTER/BLOCK LIGHT SOURCE:  If you are in an area where there is shade, go to the edge of it.  You don't want to go into a cave or so far into shade that you lose the authentic color and lightness of the environment...Use trees or structures to filter the light OR to actually BLOCK the harshness of the light...You still are able to get the beautiful rays, but without the harsh spot causing hazy halos or the inability of the camera to focus on anything.


4. LOOK FOR NATURAL REFLECTORS: You probably have recognized that indoors, it's easier to take a picture in a room painted a light khaki or pale yellow or even white as opposed to a dark red or brown room.  It's because walls become natural reflectors of light...it's the same outdoors in full sun.  If you are in a shady spot, you don't want dark photos because everything is contrasted so drastically...so look for natural reflectors, with your back to the sun or under a tree...find light colored sidewalks or a pond or even a building with light colored siding...use what is around you to naturally give you the light you need.

5. WATCH FOR HOT SPOTS, RACOON EYES AND HALF/HALF SHADOWS: I mentioned this a little bit before in my #2...be aware of the light as it hits your subjects.  You won't be happy with the final result if everyone has "black eyes" or if one eye is shut on the sunshine side of the face...Be ever aware of the direction of the light, the angle at which it falls...

The easiest times of day to shoot are typically early morning and then just before sunset.  The sun isn't at full force, so squinting is rare, but the light is soft and yet bright enough to give you the glow that you love...HOWEVER, "moments" don't always revolve around OUR time schedule...so be watchful and prepared so that you can not just capture moments, but capture them in a way that is meaningful and tells a story!

Enjoy!!!


Teach It Tuesday...

It's a short one...more of a "reminder"...

Today is my birthday...woot woot!!!

So, in honor of that AND {Teach It Tuesday} I thought I'd give a few tips on how to photograph a birthday event!  Most of the tips have to do with composition, but there are some technical aspects to consider as well!!!

I take pictures of my girls' birthday parties all the time, and when I can't do it, I get my BFF to come over and capture the important parts for me...

I went back to one of my favorite "themed" birthday parties for one of my girls...it's been almost 3 years since then, but I think the images will help in illustrating my "tips"

Here we go!

1. DETAILS:  This is probably my favorite part...especially if you have a "themed" birthday party.  Just like setting the "scene" in a story that you read, "details" help tell the story of the party itself...it gives you the "feeling" and helps you imagine yourself or remember yourself back to that moment in time!

Technical things to remember: find your light source and be sure that it illuminates the objects appropriately.  Use your camera settings to give a feeling of depth and "something happening behind the scenes"


2. CATCH the ACTION:  Especially for children's birthdays, there are a lot of expressions being made, action going on...have your camera ready...be inconspicuous so that you can capture those unexpected moments...surprise them and quickly take the picture...zoom in close, and then use a wide angle to show the entire scene.

Technical things to remember: Indoors especially you'll have to watch your camera settings.  This might mean limiting where you stand due to your light sources OR it might mean upping your ISO.  Do not lower your shutterspeed so much that you get blur.  Remember to use the tips on getting SHARP images as well


3. Don't forget to get a unique picture of the BIRTHDAY girl or boy!  This is sometimes hard for me to remember, as I get caught up in the moment.  However, it's important to capture the essence of the one whom you are celebrating...Don't just get a snapshot standing straight and tall and saying CHEESE...Make it about THEM...get them to laugh or giggle...find a way to capture WHO they are in that one small shot.


4. THE CAKE!  The cake can be part of the details, but also part of the action...Who doesn't love a good "blow out the candles" shot???  

Technical things to remember:  You can take this shot many different ways...you can focus in on the cake and blur the person...you can focus on the person & blur the cake...you can stand in front of your light source to give a crisp/bright feel or (as I did below) you can stand on the other side and create a shadowed/cozy feel.

5. PICTURE PEOPLE! Get pictures of people...even the cheesy shots...because your kiddos will want to remember who was there and what they got them...it's okay to get those "typical" shots every once in awhile...


When it's all said and done, you'll have a fantastic memory for your son or daughter or niece or nephew or whomever...and then if you get REALLY creative...you can make them a little slideshow they can put on their iphones and watch whenever they want!!!


I promise I don't talk this fast in real life!  

Just a few thoughts to ponder when trying to decide between taking your "big girl/boy camera" or just your iphone!


CHATBOOKS are a great, inexpensive option for iphone pictures that you still want to use to "tell the story" or document an event!

SHUTTERFLY has inexpensive scrapbooks that you can create...they have come a long way with their layouts, etc.  They give you a LOT of control to create your own unique albums.

I've recently started a BOARD on pinterest for ideas & ways to showcase your images.

Here is a link to my SNAPSHOP classes as well!  If you haven't taken a class yet, please shoot me an email at ctphotomemories@gmail.com...I'd LOVE to schedule a class later this fall!

HERE is my #kidsfreeinnyc INSTAGRAM gallery from my trip to NYC with my hubby...pictures taken just on my iphone as opposed to my big girl camera!

HERE is a blog post I did on TIPS for taking pictures while on vacation.